Friday, April 8, 2022

Racing

 What happens when spring arrives? For me,  it would be racing and softball. The weekends have begun with both keeping us busy. 

We made it to the dirt bike races this weekend. It was very close to home, so that’s how we pick and choose which race to attend to watch Brandon & Cohen race.

Cohen raced the kids race Saturday. Brandon was with the adult races Sunday. But we only went for the kids Saturday race to watch and support Cohen. 


This year he moved up from the peewee division to the big kid division. That means he’s one of youngest in this age group and has to have a bigger bike than last year. I have to brag a little on him in ending last years competition with 3rd place overall in the peewee division. So this year it’s a new playing field for him all the way around with older competitors and a bugger bike. 


It’s ok he didn’t get 1st place. My advice and encouragement is always as long as you race it with no injuries and you finish the race is what makes you a winner to me. And he did just that. With a few spills and crashes in the wooded muddy trail, that we didn’t see, Cohen came in 5th in his division of 12 competitors. So, yes! he did awesome!


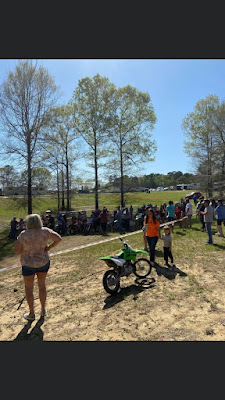
Here we are before his race - Cohen, Everett, Wyatt, Natalie, and Larry & Brandon in the background. We just hung out watching the peewee division and they have a beginner moms division that we watched, which was hilarious.

 First time mom beginner racers - you can only imagine. For starters they were slow, I mean slooow, they were not dressed in full gear, they were so polite to one another on the race trail. . I guess you had to be there to see what was so hilarious. 

It was a beautiful sunny fun day. I wished we had stayed over to watch Brandon on the next day. 
I love my dirt bike racers. 


Tuesday, March 29, 2022

Some Decorating Ideas

Now I’m into some crafty diy decorating ideas. So I’ve been busy with some things. 

First, a burlap wreath. 


It’s simple. It’s 18” diameter. It’s things I had in my stash, so no new money spent on supplies. 

Supplies needed:

34” length of stiff, but bendable wire 

12ft roll of 6” burlap 

Your choice of ribbon 

Hot glue 

Thread center of the width of the burlap onto the wire using the end point of the wire as a needle to gather the burlap onto the wire. Gather burlap to your desired fullness/tightness and then hook both ends of the wire together to form a circle to create the wreath form. 

Make bow from your choice of ribbon and attach to wreath. Glue a jute rope piece onto back for hanger. 

I had to make a bunny door hanger to be in the Easter decorating mode. I free handed drew a floppy ear bunny on cardboard. I did measure from side to side to be sure ears, feet, face, and body were rather symmetrical on each side. Larry cut it out with a box cutter. I wrapped the bunny form with chunky yarn to give it a fuzzy feel and look, using hot glue along  the way to keep the yarn in place. Made a fun bow and a yarn pom-pom for the bunny tail. This bunny is huge/ 28” tall and 18” across. But oh so cute!


The burlap wreath and the bunny door hanger have found a new home. Jennifer, my daughter, claimed them both for herself.  

I enjoyed  making them even tho they didn’t get in my decor. Try making one of them for yourself or to give away. They are soooo easy. 


Gin 

Sunday, March 20, 2022

Beautiful Day For A Ball Game

The sky was blue, the sun was bright, the breeze never stopped at the ball park today. Watch this video below of my girl the catcher. 


They are the 9up (9&10 year olds) Lady Bulls with a baseball/softball league. Of course, all the teams and players are fun to watch. But I like this catcher the best!!

Gin

Friday, March 18, 2022

Date Night

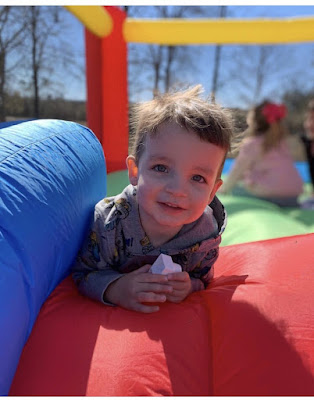
 Actually it was a full weekend date with one of the little ones in the family, Wyatt spent a few days and nights with us. He’s two. Our hands and heats were full. 


 He was so good. Was all smiles the whole time,  ❤️ 

Gin 


Tuesday, March 15, 2022

The old vintage flour sack

 Hello. Do you old enough to remember the  flour sacks from years gone by? I remember them from my the years with my grandma. I am in the possession of a lot of them from my husbands grandmother. I’ve had them now for years and years. Sine are plain muslin, some have the printed brand name in them. 

Anyway, it’s high time I enjoy them. My plan “A” is to turn the vintage flour sack into a flower sack. See the comparison there - flour / flower ?

The ingredients I needed: flour sack, 5” wide burlap ribbon, 1.5” burlap ribbon, napkin with design of your choice (I’m using bunnies), flower bouquet, mod podge or Elmer’s white glue, paint brush or sponge brush, scissors, hot glue gun. I think that will do it. 

First step is to cut the napkins motif object out fussy cutting around the object, separating the layers of the fabric so you only have one layer, and use a motif that fits in the width of your wide burlap ribbon. My flour sack is 18” around, so I need about 5 or 6 bunny motifs from my napkin. 

Mod podge the napkin bunny motifs on the burlap ribbon spacing then to your desire  NOTE: you can use Elmer’s white glue in place of mod  podge, it has the same effect to adhere and seal your motif in place and also dries clear. 


You’ve made your own bunny ribbon!!! 

Lay your bunny burlap ribbon you made on the flour sack and get ready to glue it in place. I placed mine about 2-3 inches from the bottom of the flour sack. It’s better to stuff your flour sack with something so it’s not flat as you glue the ribbon in place. I stuffed mine with an old pillow stuffing, just temporary cause it’s going to be a flower sack/basket not a pillow. 


Starting on the front center,  glue the top and bottom edge of the burlap bunny ribbon you made onto the flour sack.  When finishing  it in the back,  cut off excess burlap ribbon that is not needed and glue the two ends down in a smooth finish. 


Now. At the top of the flour sack, make a cuff by folding down the top 2 tunes or so (depending how tall you want the now flower sack to be. Make the narrow 2.5” burlap ribbon into a strap about 18-22”, glue onto the insides of the cuff where the handle should be. 


Add your flowers!!! 

You will need to add something to the bottom of the sack to help it stand up. I cut a cardboard about 3”x6” to lay in the bottom to give it a flat bottom for standing. and you may want to put a flower foam thing in the bottom to stick the flowers in to keep them straight and in place. And I stuffed the flower sack with  natural color raffia. Any type bag can be used like a blank canvas bag, sew your own bag up from fabric, or try those fiber/plastic shopping bags, etc.  


Now I feel quilty and feel the need to make one for Larry’s 3 sisters so they can have one of their grandma’s flour sacks. 


Gin 


Saturday, March 5, 2022

Oops


 I forgot about the blog. Where does the time go? I have a few things to show and tell during the last few weeks

There was the birthday for me that I celebrated on and off depending where I was and who I was with. And throwing in a little Mardi Gras in the mix wasn’t a bad thing either. 

There’s no overload of pictures to share. But here’s one of me and Brooklyn snd Brynlee on a Tuesday doing a painting while celebrating my birthday and me having a play date with them while school was out for Mardi Gras. 


We are all quite the budding artist! 
I printed a few bunny and chick free printable templates for us to have a cheat sheet, then we painted the background of the camvas and then used the paint to draw our outline. And, VOILA! We painted it all in, painted the faces and ears and feathers. 

I do think we did good. 


Then there was lunch and cake. 

And a look at the float the girls softball league had in the Mardi Gras parade. 


Gin


Monday, February 7, 2022

Still At It

 Yes, my quilting never ceases. It’s a passion. It’s enjoyment. It’s my downtime. It’s my therapy. January got 2 quilts in the books. One I had committed to making a quilt for a huge organized softball raffle for Brooklyn’s league. They have a great list of terrific prizes to win - a grill master grill, large flat screen tv, $100 gas gift card, Visa gift card, sack of crawfish, and the quilt.  The drawings are Feb 19th, so it’s ready and packaged in plenty of time. 

The quilt pattern is vintage star. Of course, I put my spin on it and made it bigger and bigger. The bigger the blocks the quicker and easier it comes together. 

Here it is. 

it 

The blues and lavenders are really bright and vivid in person with a thin gold metallic outline on the print designs. The fabrics are a matched line and blends so pretty. It measures 102x102. 

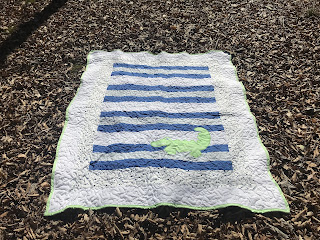
The second Jan quilt is the alligator against strips of blues and whites. It’s kinda my own mock-up of a piece of art work.this is the fourth alligator one I’ve made. I’ll just keep on hand and ready for someone who requests it. It’s a popular choice of the ones I make. With the blues, the thin blue stripes, the blue bubble look, with the white and ohhh that pop of green for the binding, it looks like the alligator in some blue water. 


This is not a good picture of it. It looks all crooked and out of  shape. But it’s better than the picture shows. I say, the bigger the blocks , the quicker and easier it is!

A hint for February quilts in the works is another giant vintage star and another bunny quilt. Stay tuned!

Gin

Monday, January 31, 2022

Happy Birthday 2


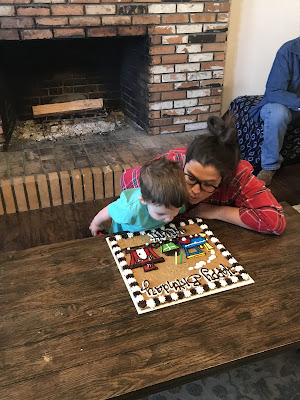
 Happy Birthday Wyatt!! He made 2 this past week, He’s the youngest of our crew. He’s a cutie and I love watching  him grow and learn. 


He was into his presents and pizza and cookie cake’


I love watching him grow and learn. 


There was also other celebrations for January. 
There was Chris’ birthday. (Son in law)
There was Brandon/Julie’s anniversary. (Son/daughter in law)
There was Travis’ birthday. (My brother)
There was Larry’s Birthday. (Husband)
So a big bunch of best wishes to everybody!! 

Gin


Wednesday, January 5, 2022

Sneaux Interruption


 Well, we call it sneaux (aka snow) here in south LA/MS. We were hitting 70 degrees Sunday. Then Monday about noon snow flurries came falling down to only last maybe 30 minutes. Don’t judge, I know it actually looks like fall with all the leaves, but it’s Jan 3. And it’s not like it’s a blizzard or anything. 


It interrupted my Valentines marathon. The wintery mix put me in a winter mood. I scrounged up some snowy looking stuff from my junk box and made a cute wintery wreath. 

* snowy owl 

* dollar tree styrofoam wreath

*white chunky yarn

* baby’s breath flowery stems 

* red and white glittery balls 

The owl is from Hobby Lobby Christmas 66%  off sale a few days before Christmas. Yes! I scored quiet a few cute ornaments for about $1 something each. 

My version of a snowy day wreath is cute!


Tomorrow I’ll be back in Valentine mode. 

Gin 


Monday, January 3, 2022

Valentine Marathon

 It’s January but I’m thinking February for Valentines Day. I whipped up a few Valentine hearts to decorate with and a few to give. I’m doing a marathon of valentine pretties the next few days while I have nothing else to do. 


Because come next week a quilt is in the works for a donation to a girls softball league raffle happening in mid February. I’m just patiently waiting on the fabrics for it to come in the mail. So in the meantime I’m loving all things Valentines. 

This pretty lace heart was simple. Gather one wire clothes hanger (or comparable size wire), lace or decorative cloth, assortment of ribbon, flower or some sort embellishment, glue gun, and scissors. 

Bend and shape the hanger or wire into a heart shape. It really forms easy. Just push and stretch and shape till you get the desired look. Put the wire form in between two layers of the lace or cloth. Run a bead of hot glue in sections around the wire, laying the lace or fabric in place on top the wire and press with an object into place (not with your finger because you will get burned from the hot glue). Complete one layer of the lace or cloth then turn over to be the other side of the wire in the same manner. You should now have the lace or cloth hot glued to each side of the wire having a top and bottom layer. Cut with scissors around the outside of the wire trimming off the excess lace/cloth. Now you have a decorative heart shape. Use ribbons, trims, embellishments to decorate and finish it. I put a ric-rac trim around the perimeter and a flower group and ribbons as a streamer in the corner. 

I love it! It’s so me! Lace, bling, ribbons, flower equals pretty. 


Gin